| |

BATTLEFLEET 1900
PRE-DREADNOUGHT NAVAL WARFARE: 1890-1905
 Welcome to Battlefleet 1900, a
set of miniature wargame rules which recreate one of the most exciting periods
in the history of naval conflict. For nearly two decades beginning in 1890,
established and developing nations engaged in a series of wars and naval
programs which were to reshape the world's political landscape. The variety of
ship designs and naval doctrines developed at this time resulted in an amazing
range of possible results, and the ensuing pre-WWI power struggles made for
volatile crises which left no nation safe. It was at this time that the navies
of two ancient empires; Russia and Spain, were dramatically defeated at the
hands of two new industrial powers; Japan and America. Not only did the
Spanish-American and Russo-Japanese Wars bring the latest in naval technology
to the forefront, but so did numerous other confrontations throughout this
period. Welcome to Battlefleet 1900, a
set of miniature wargame rules which recreate one of the most exciting periods
in the history of naval conflict. For nearly two decades beginning in 1890,
established and developing nations engaged in a series of wars and naval
programs which were to reshape the world's political landscape. The variety of
ship designs and naval doctrines developed at this time resulted in an amazing
range of possible results, and the ensuing pre-WWI power struggles made for
volatile crises which left no nation safe. It was at this time that the navies
of two ancient empires; Russia and Spain, were dramatically defeated at the
hands of two new industrial powers; Japan and America. Not only did the
Spanish-American and Russo-Japanese Wars bring the latest in naval technology
to the forefront, but so did numerous other confrontations throughout this
period.
Over all this loomed the super-fleets of Great Britain and
France, the later of which dominated the late Victorian period in ways not to
be known during the dreadnought era. The high seas of this time saw
"futuristic" French battleships eyeing their British and Italian counterparts,
heavily armored American coastal battleships maintaining the Monroe Doctrine
and the latest British built Japanese fleets shooting it out with the Russians
in the West Pacific. In Battlefleet, many of the possibilities and realities of
this time can be recreated, with your abilities having a direct effect on the
results. |
- 0.0 Contents:
- 1 Introduction:
- Scales, Models,
Equipment, Turn Sequence
- 2 Command:
- Divisional Orders, Signals, Fleet Orders
- 3
Movement:
- Formations, Turning, Changing Speed
|
-
- 4 Gunnery:
- Targets & Positions,
Ranging, Measuring
- 5
Torpedoes:
- Launch Arcs, Calculating Hits
- 6 Damage &
Sinking:
- Recording Damage, Damage Types/Glossary, Damage Locations,
Damage Control
|
| |
|
| GAME SCALES |
| Feature |
Small |
Medium
Small |
Medium
Large |
Large |
| Measurement Format |
Millimeters |
Millimeters |
Inches |
Inches |
| Recommended Scale |
1/6000 |
1/3000 |
1/2400 |
1/1500 |
| 1 Kilometer |
80 |
120 |
6 " |
8½ " |
| 1 Nautical Mile |
148 |
220 |
11" |
15½
" |
| 1 Cable |
15 |
22 |
1¼ " |
1½" |
| 1000 yards |
73 |
108 |
5½
" |
7¾
" |
| Each range bracket |
200 |
300 |
15 " |
20 " |
Maximum gun
range
(4 range brackets) |
800 |
1200 |
60
" |
80
" |
| 1 turn |
Approximately
Three Minutes |
« 1.0 Introduction
Battlefleet 1900 is a moderate complexity rules package which can be used with
all standard and custom built naval wargaming miniatures and flats. The rules
allow for both die rolling or range guessing as part of the gunnery system, and
the damage tracking system is designed to present an ever-changing pattern of
damage. This last item prevents players from minutely calculating the
near-future performance of their ships including sinking, which itself is an
uncertain proposition during battle. This rules text is cross-linked with other
support features which can be independently reviewed from the Battlefleet 1900
home page.
« 1.1 Game Scales
Battlefleet 1900 can be played in one of four different scale formats; a small
scale, two medium scales and large scale. The small scale format uses metric
measurement and is designed for use with 1/6000 scale naval miniatures,
allowing games to be played on a dining table. The medium-small scale format is
also metric based, and is designed for use with 1/3000 scale miniatures being
used in a small to medium sized playing area. The medium-large scale format is
inch based – for players who don't like metric – and is geared more
toward 1/2400 or 1/1800 scale, using a slightly larger scale for use in medium
to large playing areas. The large scale format uses inches for measurement and
is designed for use with 1/1500 scale miniatures or larger. Keep in mind that
any model size can be used with any of the game scales according to player
preference. Vessel speeds and guns ranges can also be recombined; for example
we sometimes play games using medium movement rates and large firing ranges.
All scale ranges and ship speeds for these formats can be referenced or
calculated using the Master Scale Chart, which
contains all information necessary to figure a ship's speed for Battlefleet
1900 ship logs.
« 1.2 Miniature Ship
Models
Game play requires the use of miniature ship models, many of
which are available at Store
here at WTJ. The WTJ Naval miniatures offer a variety of pre-dreadnought era
naval miniatures, ranging from the big battleships necessary for the core of
your fleet to gunboats and destroyers needed for supporting roles. Also
available are minelayers, maintenance ships and other auxiliary vessels to help
add realism to the game. The miniatures are available in 1/3000, 1/2400, 1/1800
nd the popular new 1/1500 scale, which offers the best combination of size
versus detail.
Mounting - Small scale vessels should be mounted
on bases for ease of handling. For 1/6000 scale the best mounting standard is
½ x 11/8 inches (13mm x 30mm) for capital ships.
For 1/3000 scale miniature bases a standard size range of ¾" x 2" (20mm
x 50mm) for most capital ships should work well. The lengths may be adjusted
upward or downward for other ships sizes. For example the Russian battleship
Peresviet and most newer Japanese battleships may look best on 55mm long bases.
Within the rules text, the term vessel, model or ship also
applies to any base upon which that model might be mounted. Conversely, any
reference to bases also infers the ship model itself in any case where players
are using ship models without bases.
« 1.3
Equipment
Naval wargames are a bit more technically demanding than
some other forms of miniature wargaming and require a few extra tools. The
standard gaming equipment of tape measures, six sided dice (one of which is
referred to as 1D6) and pencils are definitely required. Players will also need
to download the Battlefleet Combat Chart, Ship Log, Gunnery Log and Arcs sheet.
Cutting out the arcs-of-fire and turning circles and mounting them on thin
cardboard will give them extra strength. A clipboard is also valuable for
writing on the ship and gunnery logs. Splash and hit markers can be very useful
and add an interesting realism to the game. For many scales the best splash and
hit markers are made from plastic dart tips by cutting off their mounting
threads with a razor blade. If no white ones are available they may be roughed
up slightly with sandpaper and painted white before applying a sealer to
prevent chipping.
Combat Charts: Each player should have a copy of the
Battlefleet Combat Chart, which can be downloaded off of the Battlefleet 1900
page in the WTJ Games section. There are two sides to the combat chart, both of
which are needed for game play. They jointly include turn sequence, gunnery,
torpedo and damage charts. For related overviews of each section of the chart,
see More About Combat Charts, which
includes step by step illustrations and outlines.
| TURN SEQUENCE |
- 1) Command
- Players issue basic movement orders for the
upcoming movement phase and attempt to send messages or order requests to other
commanders.
- 2) Movement
- Players simultaneously move their ships according
to the basic movement orders issued during the Command Phase.
- 3) Ranging & Gunnery
- Players simultaneously guess ranges to enemy ships
and record them on their gunnery logs. All ranges are then marked as hits or
misses.
- 4) Torpedo Launches
- All torpedo launches are declared and any resulting
hits marked.
- 5) Damage
- a) Check for ongoing fire and flooding
effects.
- b) Resolve damage for hits achieved during Step
3.
- c) Attempt damage control.
- d) Test for sinking and uneven flooding
effects.
|
Ship Logs: Each vessel used in combat will need to
have an entry in one of the ship logs. These entries are used to track
available speed, weapons and damage to each vessel. The information shown in
the Ship Values listings on the Battlefleet 1900 page has all the information
needed to fill out the ship logs for those vessels. For more detailed
explanations, see More About Ship Logs.
Gunnery Logs: Because Battlefleet 1900 uses a range
estimate system to control gunnery, players use Gunnery Logs to record their
range estimates. Each gunnery log contains two four-ship sections (most navy
divisions are composed of four ships), along with a command line at the far
left of each division. At the top of each gunnery log column, record the name
of one ship. In the columns below, record salvo targets and hits. The spare
command boxes along the top edge of each division are for recording command
arrows during times when vessels are not firing salvos and/or out of range. The
spare boxes eliminate the wasting of range boxes during preliminary
maneuvers.
« 1.4 Turn
Sequence
Once all players have filled out their ship and gunnery
logs, placed their ships and arranged their formations, game play is ready to
begin. Each phase of the turn sequence is conducted by both players
simultaneously. At right is an outline of each turn phase and its basic
steps. |
|
« 2.0
COMMAND
During the Command Phase, players issue orders for the
upcoming Movement Phase. There are two types of orders; Divisional and
Fleet. Divisional orders are recorded in the far left command column of
the gunnery chart and apply only to the ships within a division, which are
assumed to be under orders to follow the lead ship of that division. Fleet
orders are written on small Post-it style message pads and used for any
communication between players.
« 2.1 Divisional
Orders
If a division commander wants his ships to move in any
direction other than straight during the upcoming movement phase, he must order
them to do so in the Command Column of the Gunnery Log. Divisional orders are
recorded as small arrows, which are drawn in the direction and approximate
bearing which the commanding player wishes to move them. Refer to the examples
below for the available division orders:
| Turn-in-Succession - A
turn-in-succession is drawn as an arrow using a single line. Only divisions
deployed in line-ahead may use the turn-in-succession order. Ships turning in
succession will maintain their line ahead formation while turning on a
stationary pivot-point. Vessels which will turn less than 45° during their
movement do not need to use a command arrow. Vessels which will turn between
45° and 90° during their turn use the 45° arrow, and vessels which
will turn 90° or more during movement use the horizontal arrow. Note that
the arrows are direction specific. If a player draws an arrow pointing left (to
port), then the division must turn in that direction during their movement. The
Turn-in-Succession figure at right depicts a 90°+ turn in succession to
starboard as executed by ships in a line-ahead formation. |
 |
 |
|
| Simultaneous Turn - A
simultaneous turn is drawn as an arrow using two lines. Each vessel in a
division ordered to turn simultaneously will individually turn in unison in the
direction ordered. Vessels not in line ahead formation will always use the
simultaneous turn command. If a turn-in-succession order is accidentally given
to vessels not in line ahead, the command will be treated as if it were a
simultaneous turn order. Note that if a division is in line abreast, only
certain simultaneous turn commands will allow a return to line ahead. |
 |
A division must execute its turn orders at the very
beginning of its move. If, once it has fulfilled the minimum requirement of its
order, it has remaining movement, it may continue moving straight on its new
bearing, or execute further multiple orders, if any (see multiple orders). If a
vessel is ordered to execute a turn which it cannot fulfill even by using all
available movement, it will complete as much of the turn as possible.
Stopping - Writing a dot or small filled-in circle on
the command line of a division will order it to use the turn's movement phase
to stop dead in the water. Vessels under a stop order must still move their
minimum required movement for the turn, at which point they are considered at a
complete stop. The stop command may not be used in conjunction with any other
orders (see Multiple Commands below).
Multiple Commands - Divisions with sufficient
movement allowance may be issued multiple commands other than the stop
command. Multiple commands will be executed in the order in which they are
written, reading from left to right.
Dropping Out - Individual vessels which suffer damage
– especially to their propulsion – may need to drop out of an
existing division to avoid slowing down other ships. This may only be done if
the vessel in question has at least one more propulsion box hit than the next
vessel(s) immediately aft. In such a case, the "slow" vessel may be announced
as dropping out during the command phase, at which time it becomes a one-ship
division and receives its own movement order each turn. During the next
movement the ship must turn out of the existing divisional line in order to
allow the ship behind it to close the existing divisional formation. The lead
ships of that division may need to slow down slightly in order to allow the
rear ships to close the gap made as a result of the missing vessel.
Transfer of Command - Division flagships which have
suffered damage may have to transfer their command status to other ships within
their division. There are two basic conditions under which this occurs;
voluntary, and involuntary.
Voluntary: If a player's division
leader has suffered damage which endangers the ship, he may want to transfer
flag status to another vessel in the division. Division flagships which have
not suffered conning tower hits may transfer their command to another vessel in
their division by slowing to no faster than 1/6 original speed and declaring
their transfer to any other qualified vessel which lies within one-quarter of a
range bracket and which is also moving no faster than 1/6 original speed.
Involuntary: If a division's flagship is suffering either a
steering or conning tower hit, the controlling player must roll
for transfer of command to other vessels. In this case the transfer requires no
slowing of the vessels, since it infers the assumption of command by another
officer. Beginning on the command turn after the damage occurs, roll one six
sided die (1D6). If a 5 or 6 is rolled, the ship
closest to the flagship will assume command of the division (and of the fleet
if it is replacing the fleet flagship). Add one-half point to the die roll for
each point of uneven flooding and for each fire at the time of the die roll.
For example: A flagship with a conning tower hit, six fires, and three points
of uneven flooding would result in an automatic transfer of command (+3 for
fires, +1 for uneven flooding). If the damaged flagship repairs the steering or
conning tower hit before another vessel assumes command, then the original
flagship retains its command status and any attempts at involuntary transfer
will cease, although a voluntary transfer may still be executed. If a flagship
blows up, or otherwise sinks, involuntary transfer is immediate and
automatic.
|
Hint for Small Battles
If two players share a division and they need to
communicate, they should also use the Fleet Order method. This is common with
smaller battles in which there may be no divisions; each vessel acts as its own
division. In these cases, each player commonly controls only one or two ships
which operate independently. Such a situation existed at the Battle of Santiago
Bay, during which few of the U.S. ships, despite belonging to the same
division, demonstrated much coordination of effort. In fact, there were several
near collisions during the scramble to engage the Spanish ships. |
« 2.2
Signalling
In order to communicate with other ships and players, a
player's flagship must successfully send a message. Sending a message is done
either by flying a flag message or transmitting a radio (wireless) message.
Flag communication is more likely to be received quickly by other commanders,
but it requires line of sight to the intended recipients. Radio communication
has a slightly greater chance of suffering a delay, but it can be received by
any ship on the field or even in the region without the need for line of sight
(this includes enemy ships). Vessels without radios, or vessels which have
suffered Wireless (WI) hits may not send radio messages.
To send a
message, a player – called the Signalling Commander – records
a message on the adhesive side of a "post it" style message tablet and writes
either "Radio" or "Flag" on the opposite side of the message. The message may
not be shown to other players. Once a signal is completed, it is pasted message
side down to the signalling vessel's ship log. To read another ship's signal,
any other player – called the Intercepting commander – may
consult the Command Functions table on the combat chart and roll one six
sided die (1D6). If the modified die roll value is equal to or greater than the
value shown for the corresponding Read flag message or Read radio
message action, the intercepting commander may read the message in
question. Players must keep in mind the line of sight limitation on flag
messages when attempting to intercept signals.
For purposes of
signalling, the modifier for Bridge (BR) hits is cumulative for both signalling
and intercepting ships. For example; a vessel with two BR hits attempting to
read a message signalled from a vessel which also has a BR hit will suffer a
cumulative minus three (-3) to the interception die roll.
«
2.3 Fleet Orders
There are two types of fleet
orders, Divisional and Inter-Divisional:
Divisional fleet orders
— Are only required when the flagship of a division is not located at the
front of a line ahead. In this case, the flagship must successfully send all
movement instructions to the lead ship in the line in order to be allowed to
enter a movement command on the gunnery log. If the message die roll fails,
that division may not vary its course from that of the previous turn. Hence the
wisdom of placing one's flagship at the front of a line ahead. Consult the
section 2.2 above for signalling methods used to communicate with lead
vessels.
Inter-divisional fleet orders — These are orders or
messages sent to other participating players regarding status, battle tactics,
instructions, etc. In order to signal other players with interdivisional
orders, consult section 2.2. Before 1903, players attempting interdivisional
orders must always use flag communication. After 1903, vessels received
wireless (radio) sets at various times, and players should consult historical
references for further guidance. If a ship suffers a wireless hit (WI) during
game play, it may not send or receive any further radio messages for the
duration of the game. Ships which have suffered Bridge hits (BR) will also
suffer cumulative penalties to any attempts to send flag messages. See the
combat chart for under DC & Command Actions for more details.
- Recommended Fleet Orders - Since many players are
often unsure of what messages or orders to send, especially on a small square
of paper, the following small list offers a few ideas about what orders a
commander might want to issue to adjoining divisions of a fleet. Some are
historical, and others are merely the result of previous games:
- Engage Enemy: Normally issued to capital
ships such as battleships and cruisers. This order instructs all friendly
divisions to move as close as possible to the enemy (usually the second range
bracket) while keeping out of torpedo range.
- Turn 16 points together: Means that all
ships should make a simultaneous 180° turn to port or starboard (the
direction of which should be added to the message.
- Turn 8 points together: Means that all
ships should make a simultaneous 90° turn to port or starboard (the
direction of which should be added to the message.
- Follow Me: This self-explanatory order was
issued several times historically by divisional commanders when a
commander-in-chief's ship was damaged or sunk. Commonly used when signalling a
general withdrawal or advance.
- Torpedo Attack: Most commonly given to
destroyers, this was the signal to move as quickly as possible into effective
torpedo range and launch torpedoes.
- Recall: Signals light ships to cease
attacking an enemy fleet and return to their duty stations among the main
battle line.
- We Surrender: That's right, ships which
want to surrender must make that fact known to the enemy, which is done via
this command.
« 3.0
MOVEMENT
The maximum distance a ship may move each turn is limited by
the number shown in the topmost undamaged propulsion box on that vessel's ship
log (Damaged or destroyed propulsion boxes do not count toward available
speed). A ship may move less than the maximum available, and it may change its
speed (distance moved) depending on the amount it moved on the previous turn.
The distance moved should be measured from the front edge of the ship using a
tape measure or scale, marking out the distance in inches or millimeters
depending on the scale being used. See the Scales
Page for more about scales and their relation to movement distances. «
3.1 Formations & Intervals
Most ships will take
part in a game as part of a larger group of two to six ships known as a
division. Each division moves as a unit with all ships remaining in a formation
of some type, the most common formation being line ahead. An example of line
ahead appears in the Turn in Succession figure in the previous Command section.
Ships moving in line ahead will normally try to maintain a specific distance or
interval between ships. In most navies of this time the normal interval
was one or two cables, which can be referenced on the scales page to establish the correct distance
depending on the scale being used for the game. The second most common
formation was line abreast in which the ships were side by side,
maintaining similar intervals as in line ahead in order to prevent collisions
and also to allow an easy conversion to a line ahead. An example of line
abreast is shown in the Simultaneous Turn figure in the previous Command
section.
« 3.2 Turning
Turning
circles are used during game play to recreate both the minimum allowable
turn radius of a ship and the loss of speed the vessel suffers when turning.
All Battlefleet 1900 turning circles needed for small, medium-small and
medium-large formats may be downloaded from the Playing Aids section of the
Battlefleet page. Each circle is numbered for size and marked at 30 degree
increments. As a vessel tracks along the edge of the circle, it will swing
around to its new bearing, expending the appropriate movement points in the
process. Ship bases executing a turn are not limited to moving only in the turn
increments shown. The increments are for reference only, and players may stop
at any point along a circle's circumference by estimating the amount of
available movement expended to reach that position.
Note that because
the turning circles recreate a vessel's loss of speed while turning, the actual
measurements of the turning circle increments are less than the amount shown.
This is planned, and is not a problem with the circles themselves.
 |
 |
Turning Examples
Above Left: The
turning circle is held next to the side of the vessel. Above Right: The
ship is moved along the periphery of the circle, to the approximate position
that matches the amount of speed the ship uses. In this case, the ship has used
about 85mm of its movement. |
« 3.3 Changing
Speed
During each movement phase, vessels may change their actual
normal speed by the equivalent of one propulsion box worth of movement. The
Actual Speed is the amount of movement used by any one vessel on its
previous turn. This contrasts with maximum Available Speed, which is the
highest general speed available to that vessel according to its current
propulsion rating.
Example; if a vessel whose available speed is 120mm
per turn moves only 20mm on any one turn (its actual speed for that turn), it
would only be able to move a maximum speed of 40mm on the following turn, an
increase of 20mm or one propulsion box worth of speed. Note that
destroyers only have three propulsion boxes, which gives them the ability to
vary their speeds to a greater degree, although the fewer boxes also make them
vulnerable to power plant damage due to their lack of redundant propulsion
systems.
Vessels which have suffered battle damage also follow the above
speed change limits. Hence a vessel moving at full speed which suddenly
receives three propulsion hits will take another three turns to slow down to a
speed that matches its corresponding loss of propulsion.
|
|
« 4.0
GUNNERY
Players begin the gunnery phase by deciding on targets for
each of their vessels and then visually estimating the distance from those
vessels to the targets. The name of each target is recorded on a firing
vessel's gunnery log, followed by the controlling player's estimate of the
target's distance and whether or not those guns are firing AP ammunition
(default ammunition use is considered to be HE or high explosives). Once
all ranging is complete, players measure each range estimate, marking its
termination point with a white marker for misses and a red marker for hits.
The maximum allowable range for guns depends on the game scale being
used. Consult Section 1.1 Game Scales
for a list of all maximum range and range bracket
distances.
Later in the turn players will calculate hit damage
by referring to the shell hit tables on the combat chart. Resulting hits are
marked on the corresponding ship's log, with some hits possibly triggering
additional damage. See the Combat Chart Overview
for a step by step guide to using all of the combat chart's tables.
« 4.1 Targets and
Positions
Vessels may fire upon one or more targets during their
turn. Each target must be recorded separately by name on the gunnery log, along
with the gun types assigned to that target and one range estimate
for that target (each vessel may only make one range estimate per targeted ship
per turn).
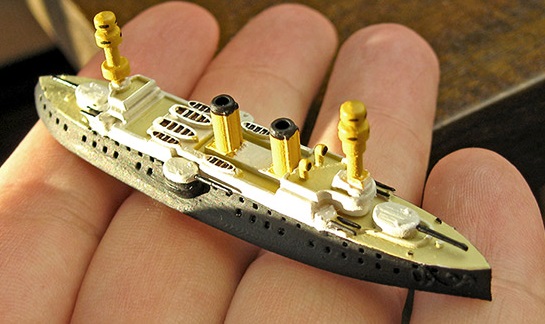
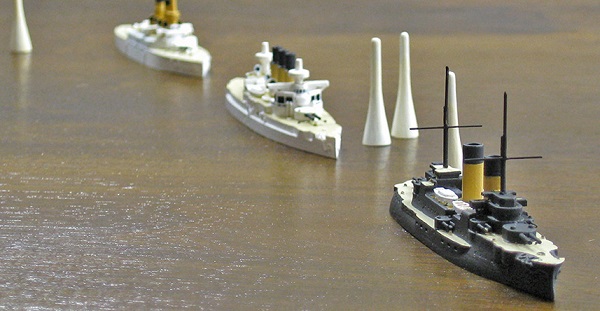
Above: French battleship ready for game play in
1/1500 scale by WTJ
Naval |
Line of Sight — Vessels may only fire upon
targets which are within their direct line-of-sight. Line-of-sight is drawn
from the forward smokestack of a firing vessel to the forward smokestack of a
target vessel. The potential target may not be fired upon if line-of-sight is
blocked in any way by other vessels, their bases or land.
Rates of
Fire — Each weapon has a normal rate-of-fire (ROF) which is shown in
the data line of the ship log's armament section. The rate-of-fire is the
number of rounds per turn which each gun in each position may normally fire. A
½ value for normal ROF means that the weapon in question may only
fire every other turn due to their slow loading-technology. A 1 value
means that each gun may fire once each turn. A 2 value for ROF means
that the weapon in question may fire twice each turn within the first two
range brackets. When firing at targets over half range (third and
fourth range brackets) all guns are limited to a maximum ROF of 1. Extra
rounds fired due to a 2 ROF may be fired at different targets, although
multiple gun positions may not split their extra fire unevenly. For example: a
two-gun 15cm turret may fire two rounds at each of two other ships, or four
rounds at one ship, but it may not fire four rounds at four different ships, or
three rounds at one and one round at another. In this regard, single mountings
are more flexible in their ability to send up a curtain of fire at smaller
vessels. Ammunition Type — Most guns used for game play may fire
one of two different ammunition types: armor piercing (AP) or high explosives
(HE). Armor piercing ammunition can only be used in the first three range
brackets. High explosives can be used in all four range brackets. The
difference between the two is that armor piercing ammunition tends to punch
holes in a ship's armor, but doesn't make as much of an explosion. High
explosives don't penetrate armor very well, but they cause large explosions. As
a general rule armor piercing ammunition is better used at closer ranges, and
high explosives are better used at longer ranges. It is also usually preferable
to use HE against lightly armored or unarmored vessels at all ranges. There are
many variables however, and some ships with high velocity guns might use AP all
the way out to the third range bracket, whereas ships with large, low velocity
guns might never use AP. If a vessel did not carry AP ammunition for its guns,
it may be noted in the Battlefleet 1900 ship statistics.
High explosives
(HE) is the default game setting for ammunition usage. A ship is always assumed
to be firing HE unless the commanding player specifically notes the use of AP
in that vessel's gunnery log. Players may assign different ammunition types to
different gun sizes on board a vessel, however all of each gun size must use
the same ammunition type for the duration of any one turn. For example: A
battleship with 30cm and 15cm guns may fire 30cm AP and 15cm HE. There is no
need to declare the 15cm ammo selection because HE is the default type. The
only action required is to write "30cm AP" next to the range estimate on that
vessel's gunnery log.
Gun Positions, Beam Patterns and
Arcs-of-Fire — The tables below show the major locations for
individual guns positions used throughout this period. There are two major
locating systems: positions and beam-patterns. Positions give
letter-coded locations for specific gun turrets and shielded weapons.
Beam-patterns help lay out standard distribution patterns of individually
mounted weapons arrayed along the side or beam of the vessel. The
letter-coded gun positions shown here relate directly to the sequence of
letters shown on the each vessel's ship chart. This will aid those
players unable to locate images or diagrams of period vessels. Each of these
positions also has an effective arc-of-fire, within which they may engage their
assigned targets, and outside of which they may not fire at all. Within the
chart below are links to photo-diagrams depicting standard examples for the
positions shown.
| POSITIONS |
| A |
This
foremost position has a 265° firing arc and is usually occupied by the
heaviest weapon(s) on board the vessel. Use the 95° arc
centered toward the stern to establish where guns
at this position may not fire. Standard example: British Majestic
class battleships. |
 |
| B,C |
An awkward arrangement,
these guns are located abreast of each other, usually on the main deck
immediately forward of the superstructure. Guns in these positions may both
fire in a 95° arc centered on the bow, and
individually have a 135° arc-of-fire anchored
off the bow when firing to either side of the ship. This gives each gun a
roughly 182° total firing arc. Standard example: forward battery of
American Columbia class cruisers. |
| D,E |
These
positions are commonly occupied either by wing turrets or sponsons. Guns in
these positions have a 135° arc-of-fire anchored off the bow. Standard example: secondary
gun turrets on the American Indiana class battleships. |
| M-O |
Usually occupied by wing
turrets which were commonly placed in sponsons, these positions have a 150°
arc-of-fire anchored off the bow. Standard
example: Russian Retvisan class battleships. |
| P-R |
These
are the most extreme wing turret positions used. Commonly placed in
prominent sponsons, guns in these positions have a 150° firing arc
centered on the beam. Standard example: French
Charles Martel class battleship. |
| S-U |
Like M & O
positions, these were usually occupied by wing turrets. These positions have a
150° arc-of-fire anchored off the stern.
|
| V,W |
Like D
& E positions, these are commonly occupied by wing turrets or sponsons.
Guns in these positions have a 135° arc-of-fire anchored off the stern. |
| X,Y |
Like B & C
positions, these guns are located abreast of each other, usually on the main
deck immediately forward of the superstructure. Guns in these positions may
both fire in a 95° arc centered on the stern,
and individually have a 135° arc of fire anchored off the stern when firing to either side of
the ship. |
| Z |
Like
position A, this rear-most position has a 265° firing arc and is also
usually occupied by the heaviest weapon(s) on board the vessel. Use the 95°
arc centered toward the bow to establish where
guns at this position may not fire. |
| Stem &
Stern |
(Not shown) Mounted in
the extreme forward or aft end of a ship, these weapons have a 95° firing
arc centered on the stem (bow) or stern,
depending on their location. Standard example: secondary armament for Peresviet
class Russian battleships. |
| Center-line |
(Not shown) Mounted on
center-line amidships on the main deck of a ship, these weapons have a 95°
firing arc centered on the beam, and may fire off
of either the port or starboard side. Standard example: main torpedo armament
for most classes of destroyers. |
| BEAM PATTERNS |
| Light caliber weapons not
assigned specific positions are usually arrayed in a variety of sponsons,
casemates or shields along both sides of a vessel. The following Beam
Patterns establish easily remembered categories for the most common types
of side armaments. All patterns apply equally to port and starboard sides of a
vessel. For example, a ship with six-inch secondary guns deployed in Pattern 2
would be able to fire four of those secondaries straight forward; two from the
port side and two from the starboard side. |
| Beam Pattern 2 |
Two
guns (probably in sponsons) have a 135° arc-of-fire
anchored off of the bow. Two guns have a 135°
arc-of-fire anchored off of the stern. The
balance of guns on that side will have 135° arcs-of-fire
centered on the beam. |
|
| Beam Pattern
1 |
One gun has a 135°
arc-of-fire anchored off of the bow. One gun has
a 135° arc-of-fire anchored off of the stern.
The balance of guns on that side will have 135° arcs-of-fire
centered on the beam. |
|
| Beam Pattern 0 |
All
guns on that side have a 135° arc-of-fire centered on the beam. Note that torpedoes mounted on
a beam pattern will only have a 60° arc of fire. |
|
« 4.2
Ranging
In order for players to fire salvos at an enemy unit, the
range between the firing unit and its target must be accurately guessed. In
most cases, this involves ship-to-ship firing, although in some cases land
mounted cannon will be firing at ships and visa-versa. In either case, the
successful guessing of the range to the enemy is required in order to have a
chance to score hits. In order to assign targets and guess ranges, players use
the Battlefleet Gun
Die Based Shell
Hits
For players who don't like
guessing ranges to establish shell hits, go to the Optional Rules page and look at rule number
406 which tells how the existing combat chart can be used for die based shell
hits. |
nery Log to record the name or names of each of their
vessel's target(s) and the estimated range to each of these targets (as well as
any ROF or AP alternatives which the player wishes to make use of). A vessel
may engage as many targets as they have firing positions, but they may only
guess one range per target. No pre-measuring of ranges is allowed.
Ranging Shots — Any ship may, instead of conducting regular combat
fire, conduct a single ranging shot in order to estimate the distance to
enemy vessels. A ranging shot never results in ammunition consumption or damage
to enemy ships, and its range must be in one of the main range bracket
increments. A vessel may not fire normal combat fire (salvos) on the same turn
as ranging shots, but ranging shots may be fired to a range of five range
brackets (normal effective fire is four range brackets or less, depending on
gun size). It is not necessary to record ranging shot distances on the gunnery
log. The controlling player instead verbally declares both the shot and its
range, placing a splash marker at a landing point of his choice.
« 4.3
Measuring
Once all target assignments and range estimates are
completed, players measure the ranges for each assigned target to establish
whether the firing vessels estimated the correct ranges. Ranges are measured
along a line running from the forward funnel on the firing vessel to the
forward funnel on the target vessel. A hit zone is achieved if the
estimated range from the firing vessel's forward funnel intersects with any
part of the target vessel or its base while maintaining line of sight alignment
with the target's forward funnel. If a hit zone is achieved, mark the target
vessel or its base with a red hit marker. If the estimated range does not land
on any part of the target, the rounds for that turn are considered too far away
to have a chance of hitting, and a white "splash" marker is placed at the
incorrectly guessed range point.
Danger Zones — A danger zone is a real
life effect due to the combination of shell trajectory and ship height. If the
leading edge of a target vessel or its base lies within the first range
bracket, then a distance equivalent to one-half of a range bracket
beyond that point counts as the target area instead of only the width of the
base or model . If the leading edge of a target vessel or its base lies
within the second range bracket, then a distance equivalent to
one-quarter of a range bracket beyond that point also counts as the target
area. Danger zones dramatically increase the depth of gun targets and therefore
the possibilities of hitting at closer ranges.
« 4.4 Applying
Hits
Once all hit zones are known and marked, players will continue
with the game until the damage phase. At that time the actual hits – if
any – caused by shells within each hit zone will be rolled for. See the
Recording Damage section for rules relating to shell damage,
and see the Combat Chart Overview for a step by
step guide to using the shell hit tables and their modifiers.
Torpedo
Effectiveness
Torpedoes were one of
the great disappointments of this era. Their sale and support had been pushed
to a fever pitch, and it was widely thought that their use alone would decide
the outcome of entire wars. The difficulties encountered in real-life use on
several occasions resulted in investigations which nevertheless failed to
dampen the spirits of the destroyer and torpedo boat flotillas of the time.
Eventually the torpedo was honed into an efficient weapon of war, but that did
not happen until later. For the major part of the pre-dreadnought era,
torpedoes continued to be a rather closely guarded, over-rated, very expensive
and rather inaccurate, short ranged weapon. |
« 5.0 TORPEDO
FIRE
After all movement and gunnery has been completed, players may
conduct torpedo fire. All torpedo launches and their targets must be declared
at the beginning of the step, and once declared, may not be canceled. Torpedoes
fired are crossed off of the firing vessel's ship log, and if necessary, a
launch marker may be placed next to the vessel's base on the launching side.
For smaller games with a limited number of launches, launch markers may not be
needed. Torpedoes may still be fired at a vessel if line of sight to that
target is blocked by another ship base, but as with gunnery, land blocks line
of sight (and travel) for torpedo fire.
Running Depth —
Unless otherwise stated, a torpedo is considered to run at normal depth, which
is set to strike large, deep-draft vessels. If a player wishes to consider any
of his vessels to be carrying shallow running torpedoes or "surface skimmers,"
it must be recorded in that vessel's ship log before the game begins.
Only destroyers, torpedo boats or torpedo gunboats may carry surface skimmers.
A torpedo running at normal depth will always miss vessels whose size
is 4 or less and will inflict standard combat damage to any larger vessels. A
torpedo running at shallow depth is eligible to strike all vessels, but will
have its size halved against any vessel with a flood protection rating of good
or great.
« 5.1 Launch
Arcs
The arc of fire for torpedo positions mounted on a vessel's
center-line is 95 degrees. The arc-of-fire for torpedoes mounted within the
side or end of a vessel is 60 degrees. In order to establish a 60 degree arc for side/end mounted
positions, use the 150 degree arc-of-fire card to establish the blind zone for
the respective positions. See the Arcs-of-Fire page
for examples. « 5.2 Calculating Hits
Measure in a straight line from the forward funnel of the firing vessel to the
forward funnel of the declared target vessel. The first vessel touched by this
line must roll on the Torpedo Hits table of the combat chart. If a hit is
scored, place a torpedo-hit marker along the side of the vessel struck. The
torpedo is considered destroyed and may not be applied against any further
vessels. If no hit is scored, continue measuring along the same line to
establish whether there are additional vessels which intersect the line,
rolling for each in turn. The maximum range for a torpedo is ten cables,
measured from the launching vessel's forward funnel. If a launched torpedo
reaches its maximum range without detonating against a vessel, it is considered
destroyed and is eliminated from play.
See the Combat Chart Overview for more information about
using the Torpedo table.
See the Recording Damage
section for more about applying torpedo damage.
See the
Scales Page for more about distances and
"cables."
|
|
« 6.0 Recording
Damage
As a vessel sustains successive hits, its Ship Log is used to
record the damage and its side-effects. Areas affected include armament, speed,
hull (flooding), fires, damage control and other supporting features like
steering, searchlights and the bridge and conning tower complexes at either
ends of the ship. Steps One, Two and Four of the Damage Phase are used to
calculate damage or its after-effects, and Step Three is used to conduct damage
control (See Damage Control for descriptions of Step Three).
Note that while mutual shell and torpedo fire is considered simultaneous, the
individual steps of the damage phase are not simultaneous. The action at each
damage step affects and preempts action in the following damage steps, although
existing hits and damage are not preempted.
Example 1). A Gunnery Phase
shell hit scored by a gun which was then lost during Step One : Fire &
Flooding is still able to score the damage which came as a result of it's
striking.
Example 2). A DC hit suffered by a ship during Step One - Fire
& Flooding is lost immediately and may not be used in Step Three - Damage
Control.
Example 3). A vessel which suffers uneven flooding as a result of
an explosion during Step One - Fire & Flooding, and then uses
counterflooding and damage control dice to reduce the effects of the flooding,
may end up not being required to roll for sinking or suffer effects of uneven
flooding during Step Four - Sinking & Listing.
Step One - Fire & Flooding: Check for
complications of ongoing fire and heavy flooding. All commanders whose vessels
have active fires and/or heavy or severe flooding must roll once for each fire,
and once for each flooded compartment on the Fire and/or Hvy/Sev
FL columns of the Critical Effects Chart and apply the resulting effects if
any. Note that the Fires section of the combat chart includes separate columns
for external and internal fires, and that a result which may result in one or
more fires being extinguished is also included. The Hvy/Sev FL column
– which is an abbreviation meaning Heavy or Severe Flooding –
may trigger fresh FL hits. Any FL hits that occur as a result of this die roll
must be randomly rolled for to see if it occurs in the same compartment at the
triggering FL hit, or in an adjoining compartment, even if the adjoining
compartment previous had no FL hits in it.
Step Two - Hits:
Vessels which correctly guessed the ranges of enemy vessels or positions during
the gunnery phase may now roll to achieve actual shell hits on the AP or HE hit
tables corresponding to the ammunition they used. Any hits which occur as a
result of the die rolls are then applied to the vessels or positions in
question. All shell hits are considered to occur simultaneously.
During the same step, players also calculate and apply damage for any torpedoes
which struck vessels during the Torpedo Movement Phase of that turn. Use the
Flooding Occurrence section of the combat chart to check for damage caused by
each torpedo hit. Torpedo hits are considered to occur simultaneously with all
other torpedo and shell hits for that turn.
See the
Combat Chart Overview for explanations of all the
hit tables and how to use them.
Step Four - Sinking &
Listing: As a vessel suffers flooding, each of its four main compartments
will be marked with the most severe type of flooding (if any) present in that
area. Each level of flooding carries an inherent point value; light flooding
equals one point, moderate equals two points, heavy equals three points and
severe flooding equals four points.
Listing (uneven flooding):
If opposing vessel compartments suffer from different flooding levels, the
uneven weight distribution of the seawater will cause the ship to tilt or
list. If the difference is from side-to-side, the ship will list to port
or starboard. If the difference is between fore and aft sections, the vessel
will be "down by the bows" or "down by the stern." A famous example of the
former was the civilian ocean liner Titanic, which before sinking, was
dramatically down by the bows. Players whose vessels suffer from uneven
flooding must consult the Uneven Flooding portion of the Listing & Sinking
table and apply its effects to the ship in question. Note that a fore/aft
disparity is less likely to result in the loss of a ship.
Sinking: When the total value of flooding points present on a vessel
reaches five or more, the controlling player must roll on the Sinking portion
of the Listing & Sinking table on the combat chart. If the unmodified die
roll result falls within the corresponding Sink Roll range, the vessel in
question has irredeemably begun to sink. To the right of the result is a number
which indicates how many turns the ship will take to sink. A sinking vessel
conducts no further movement and it cannot launch torpedoes or conduct damage
control. If a sinking vessel attempts to fire its guns, it must roll 1D6 at the
start of each gunnery phase to see if the gun crews have abandoned their posts.
On a die result of 1-3 the ship may continue firing active (undamaged) guns. On
a die result of 4-6 the crews abandon all guns for the rest of the game. No
further gunfire by that ship is permitted. Until it disappears under the waves,
a vessel will remain a navigational and line-of-sight obstacle to other ships
and batteries.
« 6.1 Damage
Types
Several of the Battlefleet 1900 combat chart tables contain
abbreviations of damage which may be inflicted on participating vessels. Each
of these damage codes triggers a very specific set of events, including fires,
flooding, explosions and damaged or destroyed weapons. The glossary below
offers definitions of all damage codes. Immediately following are guidelines
for recording and positioning the various damage types. If a certain type of
damage is called for on a vessel and there is no feature of that type on board,
then the hit is counted as no effect unless otherwise called for by the
nature of the hit in question.
| Damage Code Glossary |
| BR |
Bridge
Area |
Mark one Bridge box on
the vessel's ship log with a single damage slash. If there are no undamaged
bridge boxes, then an existing damaged box is marked as destroyed. A vessel
suffers minus one (-1) on every command roll for each damaged or destroyed
Bridge box. |
| CT |
Conning Tower |
Mark one Conning Tower box on the
vessel's ship log with a single damage slash and roll for additional damage on
the Critical Effects table. A vessel with any damaged CT boxes may not
change its own course and will not respond to change course orders from
divisional or fleet flagships. If the vessel is a flagship, it may not issue
divisional or fleet orders or attempt any command functions except the
Recover from CT hit function. |
| CAP |
Capsize |
Vessel has suffered
uneven flooding which has caused it to flip onto its side and begin sinking. No
further movement, command functions or weapon fire may be conducted by or from
the vessel. Capsized vessels take two turns to sink. |
| DC |
Damage Control |
Mark one damage control (DC) box on the
ship log with a single damage slash. If no undamaged DC boxes are available,
mark a previously damaged DC box as destroyed. Damaged and destroyed DC boxes
deprive a vessel of an equivalent number of DC die rolls. Example: A ship which
began the game with six DC die rolls (corresponding to the six DC boxes on the
ship log) suffers two DC boxes damaged. That ship may now only use four DC die
rolls each turn to attempt repairs. |
| E |
Explosion |
Roll for an explosion
on the Critical Effects Chart, adding to the vessel's ship log any resulting
fire and flood damage and effects which come about as a result of the
occurrence. Note that explosions are either Internal (i) or External (e). |
| EH |
Electric & Hydraulic
|
Roll for Electric/Hydraulic hits on the
Internal Damage portion of the Critical Effects table, adding to the vessel's
ship log any resulting weapon and damage control effects which occur as a
result. Note that the damage hits that occur as a result of EH damage must be
repaired individually (as in the case of an MM hit, which could knock out
numerous main positions). |
| F |
Fire |
One fire is started on
board the vessel. Write an F in the appropriate Fire section of the vessel's
ship log. Note that there are Internal (i) fires and External (e) fires. Each
type has very different implications for the ship and should be recorded in the
corresponding compartment in the Fires box in the ship log. An "F' hit is
always considered external unless explicitly noted as being internal by the
"iF" code.
During the first step of each Damage phase,
each vessel which has fires on board must roll one die for each fire. Each die
roll will result either in an explosion, general damage, the fire going out or
no change in the fire's condition. In the case of an explosion, refer to the
corresponding column on the same table (Internal fires cause internal
explosion, External fires cause external explosions) and roll one die for
further effects. In the case of damage hits, refer to the corresponding Di or
De table and roll one die for further effects. In the case of the fire going
out (which may or may not have happened due to crew efforts) erase one fire
of that type from the Fires box in the ship log. |
| FL |
Flooding |
Roll once on the appropriate Flooding
Occurrence and Effects sections of the Flooding Chart and apply the results to
the Ship Log.
There are four different magnitudes of flooding; light,
moderate, heavy and severe. These flooding events can be triggered by shell
fire, torpedo hits, and explosions. The affected zone of a vessel is marked
only with the worst level of flooding occurring in that zone. Vessels always
roll on the Flooding Effects section for each and every flooding hit, even if
the hit in question is of a lesser magnitude than that already affecting the
zone. |
| FU |
Funnel |
Cross out one
propulsion box as destroyed. Destroyed propulsion boxes are not repairable. A
vessel can only suffer one funnel hit during a game.. |
| i |
Internal |
Designates the hit in question to be an
internal hit instead of an external hit. Critical effects for a hit with an "i"
designation are resolved on the Internal box of the critical effects chart.
This designator is used primarily to indicate when damage occurring on the
External portion of the Critical Effect table have transformed into Internal
problems. |
| LT |
Searchlight Platform |
Cross out one
searchlight box as destroyed. Destroyed searchlight boxes are not
repairable. |
| M |
Main
Hit |
Mark one randomly selected
main armament position with a damage slash. Main weapons at that position may
not fire again until the position is repaired. An Mx result causes a main
position to be destroyed instead of damaged. An MM result causes all main
armament positions to suffer one damage mark each regardless of previous
status.
An M hit on a vessel which never had any main class weapons
immediately becomes a P hit on a die roll of 1 through
3 or an FL hit on a result of 4 through
6 on 1D6.
An M hit will also trigger an immediate roll on
the Internal: Main/TT column of the critical effects table if it
resulted directly from by a shell hit with a 100> rating or greater. Any M
hits which result from the General Damage table use the External: Main/TT
column box on the critical effects table. M hits which result from
electric/hydraulic (EH) hits do not trigger a critical effect roll. Main
positions which have flooded magazines are exempt from M hit related critical
effect die rolls. Any M damage hit which directly results in an explosion is
immediately transformed into a destroyed hit. |
| P |
Propulsion Damage |
Mark one previously
undamaged propulsion box with a damage slash. Available speed for the vessel is
reduced to the next highest unmarked box. A Px result causes a propulsion box
to be destroyed instead of damaged. |
| R |
Rudder |
An R hit results in one of three
subordinate hit types: RC, RP or RS.
RC means the rudder is jammed or fixed
on center-line, causing the ship to immediately sustain three TR hits for the
rest of the time that the rudder is locked in the RC position. Mark the
appropriate section of the ship's log to show the RC and 3TR hits. An RC hit
forces a vessel to steer using its engines, which is a far less efficient way
of turning.
RP means the rudder is jammed to port, forcing the vessel to
turn in that direction using the smallest possible turning circle until the
rudder is un-jammed.
RS means the rudder is jammed to starboard, forcing
the vessel to turn in that direction using the smallest possible turning circle
until the rudder is un-jammed.
A rudder which is already jammed or
fixed in a certain position will not be effected by ensuing R hits. An RC
condition can also be ordered on purpose by successfully executing a Secure
R repair roll. This effectively locks the rudder on center-line, preventing
any whiplashing of the rudder as a result of later damage, etc. Vessels with
their rudders fixed on center-line may still maneuver using the ship's engines
(See RC above). While any R hits exist, all TR hits on the steering engines
(ST) damage line are ignored. If however, a damaged or secured rudder is
repaired or released, all TR hits to the steering engines again become
active.
Locking the Rudder: The main reason a player might want to lock
the rudder of a ship in place is if the aft zone of the ship is suffering
flooding which threatens to become worse. In such a case locking the rudder on
centerline while there is still access to the aft steering compartment may
prevent future crippling of the ship's ability to steer. Because if a ship
suffers a crippling RP of RS hit after its aft compartment becomes
severely flooded, it will then be impossible to repair the R hit. Locking the
rudder is a method of reducing the effects of future damage to the ship,
although locking itself drastically reduces a ship's maneuverability and should
only be done after careful consideration. |
| S |
Secondary Hit |
Mark one secondary
class weapon or position with a damage slash. Weapons at those positions may
not fire again until they are individually repaired. An Sx result causes the
involved position or gun to be destroyed instead of damaged.
For
purposes of game play, a secondary weapon is: (a) The next weapon ranking
immediately below the main armament, (b) A vessel's highest level of weapon
when none qualify for "main" weapon status. So for example, in a vessel with
4-30cm, 10-15cm and 12-boat guns, the 15cm guns would normally be considered
secondary. In a vessel with 6-13cm guns and 2-boat guns, all of which are mixed
together in broadside positions, the 13cm guns may end up being classified as
secondary guns even though they are the largest weapons on the ship. This is
done to assure correct combat chart results.
On a related note, some
entries in the Battlefleet 1900 ship values indicate guns that are clearly
meant to be secondaries as being tertiary. The reason for this is the location
of those weapon positions in areas that are exposed to gunfire in the same
manner as that vessel's tertiary armaments. It may also occur that a few
tertiary guns shared armor protection normally reserved for secondary guns. In
those situations some of the vessel's tertiary armament may actually be marked
as secondary in order to assure that it shares the upperworks protection
enjoyed by the rest of the secondary armament. In all of these cases, a weapon
position is assigned its classification (secondary, tertiary, etc) based partly
on its size and ranking, and partly on its position on the ship. |
| ST |
Steering Engine |
Roll for ST damage on the Critical
Effects Chart, adding to the vessel's ship log any resulting TR hits which
occur as a result, or proceeding to the R effect column if an R hit results.
An ST hit causes damage to a vessel's steering engines or, in the case
of lighter vessels, damage to their steering linkages. This damage causes the
rudder to be less responsive, hence the negative effect on turning
performance. |
| TT |
Torpedo
Tube |
Cross out one torpedo
launch position as destroyed. Roll once on the corresponding Main/TT column of
the Critical Effects Chart for possible extra damage. Use the Internal column
of the chart if the TT hit was a result of damage from the Di column, and use
the External column of the chart if the TT hit was a result of damage from the
De column of the damage hits table. |
| TR |
Turn Radius |
A vessel with one turning radius hit may
not turn more than 60° in any one turn (two increments of the free turning
circle). A vessel with two turning radius hits may only turn 45° in any one
turn (one and a half increments of the free turning circle). A vessel with
three or more turning radius hits may not turn more than 30° in any one
turn (one increment of the turning circle). TR hits caused by uneven flooding
will disappear or be reduced if the vessel is levelled off via
counter-flooding.
Note: There are three possible causes of TR hits:
Steering engine damage; Uneven flooding, and rudder damage or locking. |
| T |
Tertiary Hit |
Mark one tertiary
class weapon or position with a damage slash. Weapons at those positions may
not fire again until they are individually repaired. A Tx result causes the
involved position(s) to be destroyed instead of damaged.
See the
Secondary Hit section above for more about the classification of gun
positions and patterns. |
| WI |
Wireless |
Indicates damage to the radio or
"wireless" equipment and aerials. Not repairable during a battle. |
| x |
Destroyed |
A letter X after a
damage code requires that the position in question be crossed out with a
destroyed mark. |
« 6.2 Damage
Locations
Some types of damage require players to establish where on
the vessel that the damage occurred. Some of these only apply to random
positions or features, whereas other types of damage must be applied in a
specific order. Refer to the Battlefleet
Randomizer to randomly select awkwardly or oddly arranged weapon
positions.
Propulsion - Propulsion boxes are marked-off
progressively, beginning with the highest value and working down to the lowest
value, at which point the vessel may no longer move. Each of the boxes may only
have one damage or destroyed mark on them at any one time. Propulsion hits
which occur beyond the available boxes are recorded in the margin and must be
repaired before repairs to any propulsion boxes may be attempted. Damaged boxes
are always migrated down to make room for destroyed boxes. I.E. - A damaged box
cannot be marked as destroyed while undamaged boxes remain below it.
Example: A Px hit is inflicted on a
cruiser which already has two boxes destroyed and four damaged (dead in the
water). One damage mark would be recorded in the margin, and the third damaged
box would be converted into a destroyed box. The vessel will now have three
destroyed propulsion boxes, three damaged propulsion boxes, and an additional
damage to "propulsion access" which must be repaired before any repairs of the
propulsion boxes proper may be attempted.
Lettered
Positions - The locations of any hits sustained by "Lettered" weapon
positions (BC, MO, SU, etc.) are rolled for individually and assigned
regardless of existing damage to them. For example, if a vessel's main turret A
already has one damage slash, it can still receive more damage slashes. There
is no limit to the number of damage slashes and destroyed markers that can be
accumulated by any one lettered position.
Numbered Patterns -
The locations of any hits sustained by weapons dispersed among numbered "Beam
Patterns" are always removed from the list of currently undamaged/undestroyed
weapons for that type. For example, if a vessel's six secondary guns are
located in beam pattern 0 and one of those guns has already been damaged, a new
S hit will cause another previously undamaged gun to be crossed out. Usually
this will result in a descending sequence of crossed-out numbers on the
vessel's ship log as "patterned" guns are steadily lost, depending on how
closely players track the three main beam patterns. See the Ship Log Overview
for more details on how to display beam patterns.
Main - Most
main ship armaments will be mounted in lettered positions (as opposed to
numbered patterns). Because of this, hits will usually be randomly located,
which is easy when main guns are positioned in only two turrets. Most players
assign a 1 through 3 roll to the forward turret and
a 4 through 6 roll to the aft turret and then roll
one die to decided which turret is hit. Ships which have their main armament in
a lozenge (diamond) layout should use the embattled-side rule and break the
location die roll into thirds instead of halves. A previously destroyed main
position which sustains a hit will still trigger a critical hit check unless
its magazine has been successfully flooded.
Secondary and
Tertiary - Each secondary or tertiary hit causes the damage or destruction
of one gun or position randomly selected from available types (some ships may
have more than one set of secondary guns). The locations of all S and T hits
are always assigned randomly from existing weapons throughout the entire vessel
and should not be removed only from the embattled side of a vessel.
A
vessel which has not deployed its boat gun crews may only suffer a maximum of
one boat gun hit from any one shell hit (no multiple gun losses allowed). Only
ships with armored decks may do this. Vessels without armored decks must always
have their boat guns manned.
Flooding - Flooding due to shell
or torpedo fire will occur randomly on the embattled side of a vessel. For
example: Hits striking the port side of a vessel will be randomly established
as being in either the forward, port amidships, or aft zone by splitting a six
sided die roll (1D6) into thirds. If hit from ahead, the damage will be
randomly established as being in the forward, port amidships or starboard
amidships zones. If due to an explosion, the damage will be randomly located in
any one of the four compartments.
« 6.3 Damage
Control
Step three of the damage phase is used to attempt repair of
damaged areas, flood magazines, counter-flood to correct listing or a variety
of other important functions. All damage control actions taken during this step
are considered simultaneous, and they do not need to be executed in any
particular order within the step.
All damage control actions are
conducted according to the results of Damage Control (DC) dice, only one of
which may be rolled against any one damage event. The number of damage control
dice which a ship starts the game with is six for all ships size 5 and over,
and three for ships size 4 and under. The number of boxes on the DC line of the
ship log corresponds to the number of DC dice available at any one time. As DC
hits are suffered on a vessel, the DC boxes will be progressively marked off,
reducing the number of DC rolls allowed per turn for that vessel.
Repair Actions - Weapons and/or positions which have
been destroyed are not repairable, and are marked off with a full X. Positions
which have only been damaged are marked off with a diagonal slash mark, which
indicates that they are repairable. To attempt damage repair, look up the
corresponding roll values for that damage type as shown on the Damage Control
box. This represents the value range within which a ship's commander must roll
in order to repair the damaged feature. Players may also attempt to modify a
pending sink roll by one die point, or stop the critical flooding event which
can be triggered by heavy flooding. If a position has more than one damage
slash, each slash must be individually repaired, otherwise the position is
still considered damaged and out of commission. Non-command related repair
actions may still be conducted even if a vessel has suffered a Conning Tower
hit (See below). Players must declare specifically which type of repair they
are making before rolling the repair dice. Below are the basic Repair Functions
and a basic outline of their use:
Repair P, BR: A successful die roll will
repair one damaged propulsion box or one bridge hit.
Repair M, ST (1TR): A successful die roll will repair one damaged
main armament position or one steering engine hit. Note that
steering engine hits manifest themselves as turning radius hits. The repair of
a steering engine hit actually allows a player to erase one of the TR hits
shown on the ST line of the ship log.
Stop Hvy FL roll: A successful
die roll allows a player to "contain" a heavy flooding event in any one of the
ship's zones, thereby preventing that flooding event from triggering any
further Critical Effect roles during the first step of the Damage Phase. Note
that severe flooding events cannot be contained, and there is no need to
contain light or medium flooding events because they do not trigger critical
events. Draw a box around the "Hvy" entry on the shop log to show that specific
flooding condition as being contained. If that zone suffers a new heavy
flooding hit at a later point in the game, the existing flooding containment is
lost and the player must attempt to roll again on this table to re-contain the
heavy flooding.
Repair S, DC, R: A successful die roll will repair
one damaged secondary gun position or one damage control box
or one rudder hit.
Secure/Disengage R: A successful
die roll allows a player to secure an otherwise undamaged rudder on
center-line, or to free a rudder which was previously secured. Secured rudders
assume an RC condition (locked on center-line) which forces a vessel to use its
engines to steer. Players may want to secure a rudder if the aft portion of a
vessel has suffered heavy damage or flooding and is in danger of blocking
access to the steering areas. Securing the rudder prevents some types of
possible damage from sending the vessel into an uncontrollable spin.
-1
this turn's sink roll: A successful die roll allows a player to subtract
one point from the sinking die roll for that vessel. The bonus point is only
valid for that turn.
Command Functions - Command related actions are
somewhat different than repair actions in that they depend on an intact chain
of command. Also, players should note that the command functions table includes
two Read Message actions which are used only during the Command Phase of
the game, not during the Damage Control Phase. Command functions may only be
attempted if the vessel has no Conning Tower hits. Below are the basic repair
related command functions available during a game and their mode of use:
Flood Magazine: Destroyed and damaged
main gun positions remain a hazard to their ship because their powder magazines
may still trigger on-board explosions if more damage occurs. To protect against
this danger, any main gun position's magazine may be flooded if the commanding
player successfully rolls one die (1D6) and the result matches the range shown
on the Command Function table. A die roll result below that range indicates a
failed attempt to flood the magazine. A flooded magazine will cause its
corresponding vessel compartment to gain one level of flooding in the
corresponding zone of the vessel; none becomes light, heavy flooding becomes
severe, etc. Once its magazine is flooded, a main position is considered out of
commission for the remainder of the game. If that position is later hit, the
vessel commander will not have to roll on the Critical Effects table.
Counter-flood: A vessel suffering from uneven flooding may
purposefully flood all or part of an opposing zone in order to reduce the
vessel's list and eliminate (or reduce) the uneven flooding's more dangerous
effects. Counter-flooding adds to the overall flooding points present on a
vessel, which will affect that vessel's sink roll. However, counterflooded
compartments do not trigger flooding effect rolls or critical hits.
A
commander wishing to conduct counterflooding must roll one die (1D6). If the
result of the die roll matches the range shown on the Command Functions table,
the counterflood attempt was successful. If the die roll result falls below the
range shown, the attempt was a failure and no more attempts to flood that zone
of the ship may be made during that Damage phase. If successful, any one zone
on the vessel may then be flooded to whatever degree the commander wishes. Once
counter-flooding is complete, reduce the damage hits to the appropriate level
called for by the Uneven Flooding table. Counter-flooding may also be used to
scuttle a vessel by rolling for "counterflooding" in each of the vessel's four
compartments while assigning severe flooding to each of them. This must be
announced in advance, and once begun may not be called off. If some
compartments successfully flood and other do not, the vessel may capsize
instead, which will still result in the loss of the ship.
Recover from CT Hit: The one command action allowed after a
conning tower hit is the Recover from CT Hit roll. The controlling player of a
vessel with a CT hit may roll once each turn in an attempt to reestablish
command of the vessel. A die roll result matching the range shown on the
Command Function table will reestablish a new vessel commander or a recuperated
old commander. The ship in question may then operate normally from that point
on. Note that because of the involuntary transfer command rule, nearby
vessels may end up assuming command of a division before a damaged flagship is
able to reestablish conning control of their own vessel. See
Command & Control for more
details. |
|